A broken window isn’t just unsightly—it compromises your home’s security, energy efficiency, and even your family’s safety. Whether you’ve got a small crack or a fully shattered pane, knowing the essentials of broken window repair can help you tackle the problem quickly, prevent further damage, and save on costly replacements. In this guide, you’ll find practical tips, step-by-step instructions, and advice on when to call in the pros.
Why Timely Broken Window Repair Matters
- Safety first: Sharp shards pose a serious injury risk. Boarding up or repairing right away protects kids, pets, and visitors.
- Energy savings: Cracks and gaps let heated or cooled air escape, driving up your utility bills. A proper seal restores insulation.
- Weather protection: Even small openings invite rain, snow, and pests. Prompt fixes prevent water damage, mold, and unwanted critters.
- Security: A compromised window is an easy entry point for burglars. Restoring glass strength keeps your home secure.
Assessing the Damage
- Small Crack or Chip
- Often repairable with a DIY resin kit.
- Visible but isn’t spreading rapidly.
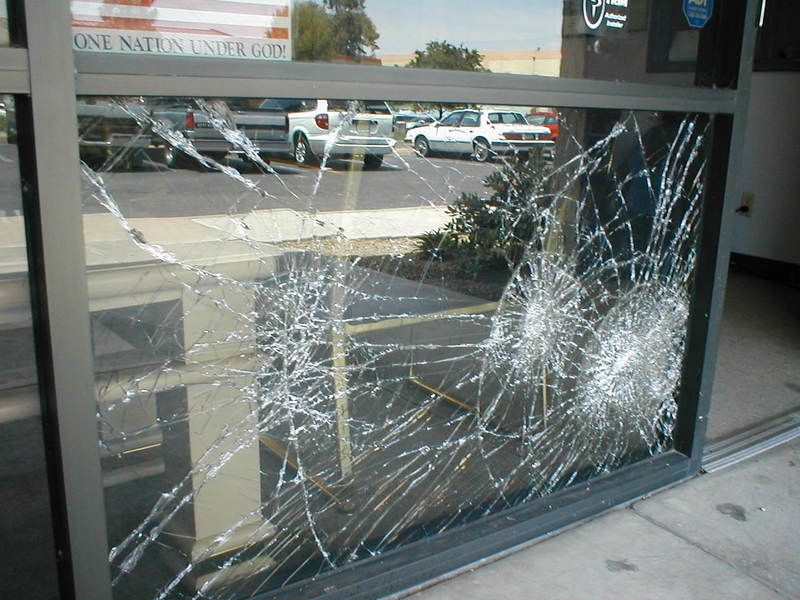
- Spider-Web Cracks
- Radiating fractures usually mean the pane has lost structural integrity.
- Consider full replacement—or, at a minimum, professional evaluation.
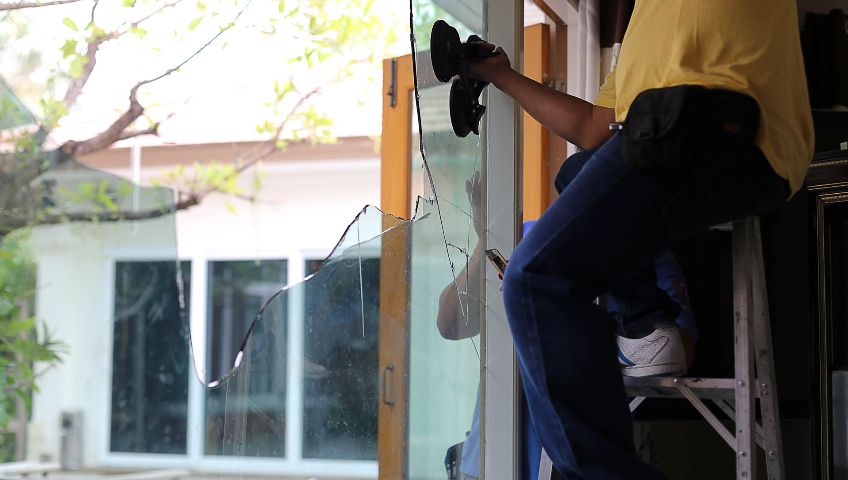
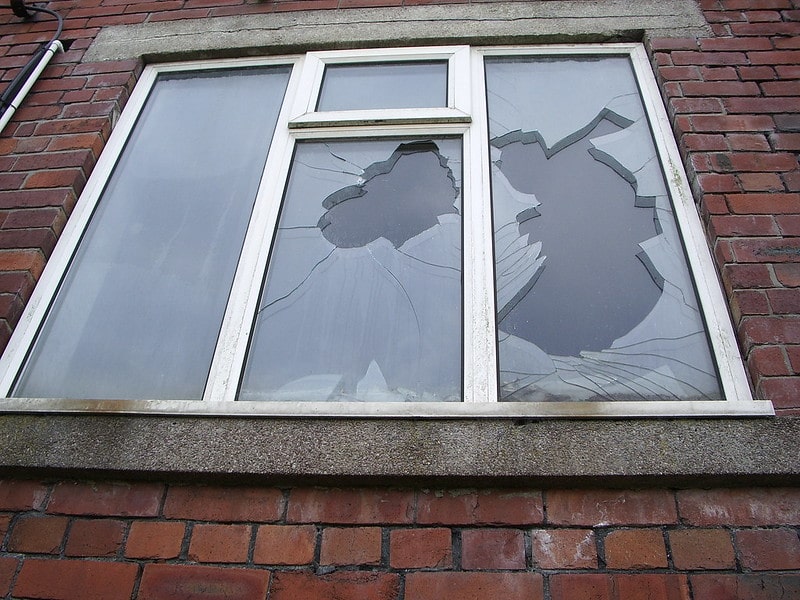
- Fully Shattered Pane
- Clear away loose shards (wear heavy gloves and eye protection).
- Board up the opening temporarily to secure your home until repair or replacement.
DIY Broken Window Repair for Minor Cracks
If the damage is limited to a hairline crack or small chip, you can often handle the repair yourself in under an hour.
You’ll need:
- Clear window repair resin or epoxy kit
- Painter’s tape
- Razor blade or scraper
- Lint-free cloth and glass cleaner
- UV light (for kits that cure with UV)
Step-by-Step:
- Clean & Mask
Wipe the area with glass cleaner. Mask around the crack with painter’s tape to protect frame and glass. - Inject Resin
Following the kit instructions, apply resin into the crack. Work slowly so the resin fills the entire fissure. - Cure
Expose the resin to UV light or direct sunlight for the time specified (usually 10–15 minutes). - Finish
Scrape away excess resin with a razor blade. Buff gently for a smooth, nearly invisible repair.
Tip: Resin fixes are temporary—plan for a full pane replacement within 1–2 years if the crack is under constant stress or weather exposure.
Full Broken Window Replacement: When to Call a Professional
For double-pane or tempered glass, historic frames, or large shattered windows, professional replacement is safer and ensures a proper seal.
Professional repair includes:
- Accurate measurement of glass thickness, pane dimensions, and frame depth
- Safe removal of all broken shards and old glazing compound
- Custom-cut glass to match your window’s specs (single, double, or triple pane)
- Proper sealing and insulation with new glazing compound, weatherstripping, and caulking
Average costs:
- Single-pane window: $150–$400 per pane (materials + labor)
- Double-pane insulated window: $300–$800 per pane
- Tempered or specialty glass: $500–$1,200 per pane
Get at least two quotes, verify installer credentials, and ask about warranty coverage on glass and workmanship.
Temporary Boarding and Weatherproofing
If you can’t repair immediately, secure the opening to protect against weather and intruders:
- Board Up
Use exterior-grade plywood cut slightly larger than the opening. Screw into studs or framing. - Seal Edges
Apply caulk around the plywood edges to keep out moisture. - Remove Promptly
Boarding is not a long-term solution—arrange a proper repair within a few days.
Preventing Future Breakage
- Choose impact-resistant glass if you live in a storm-prone area or want extra security.
- Install window film to hold shards together if the glass is broken.
- Keep nearby trees trimmed to avoid falling branches.
- Inspect caulking and weatherstripping annually and replace as needed to maintain a tight seal.